

by Echo Swinford
Yesterday I did a rush cleanup job on a nasty deck of slides for a client, and today, I got a thank you email that said:
“There is one thing I must ask you. How do you get your tables to format with such a light design (the lines of the table)? I have tried to figure out how to do this but usually end up picking one from the design menu in the tool bar because I can’t reformat the colors of the actual table lines.”
So this is what I do to get the light-colored lines:
- What I usually do first is select the table. Then I access the Table Design tab of the Ribbon, and remove all the Shading (the paint bucket icon), and choose the No Fill option (highlighted in red in Figure 1).
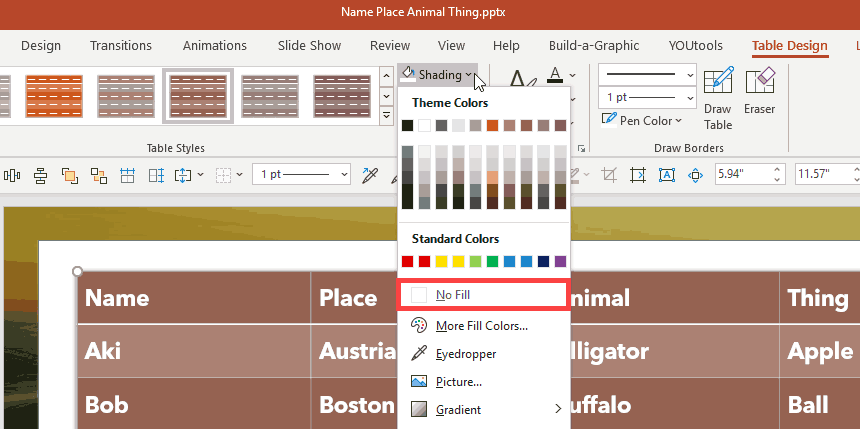
Figure 1: Choose the No Fill option- If this does not help, access the Table Styles gallery. If you click the bottom arrow at the right of the gallery, you can expand the entire Table Styles gallery and see all styles. There is a plain style at the very top called No Style, No Grid (see Figure 2). You could also start with this style to strip out all the ugly formatting in one fell swoop.

Figure 2: Choose the No Style, No Grid option- If your text color was white to start with, you may have to change the text color after you remove the background. We end up with something similar to what you see in Figure 3, below (compare with Figure 1).
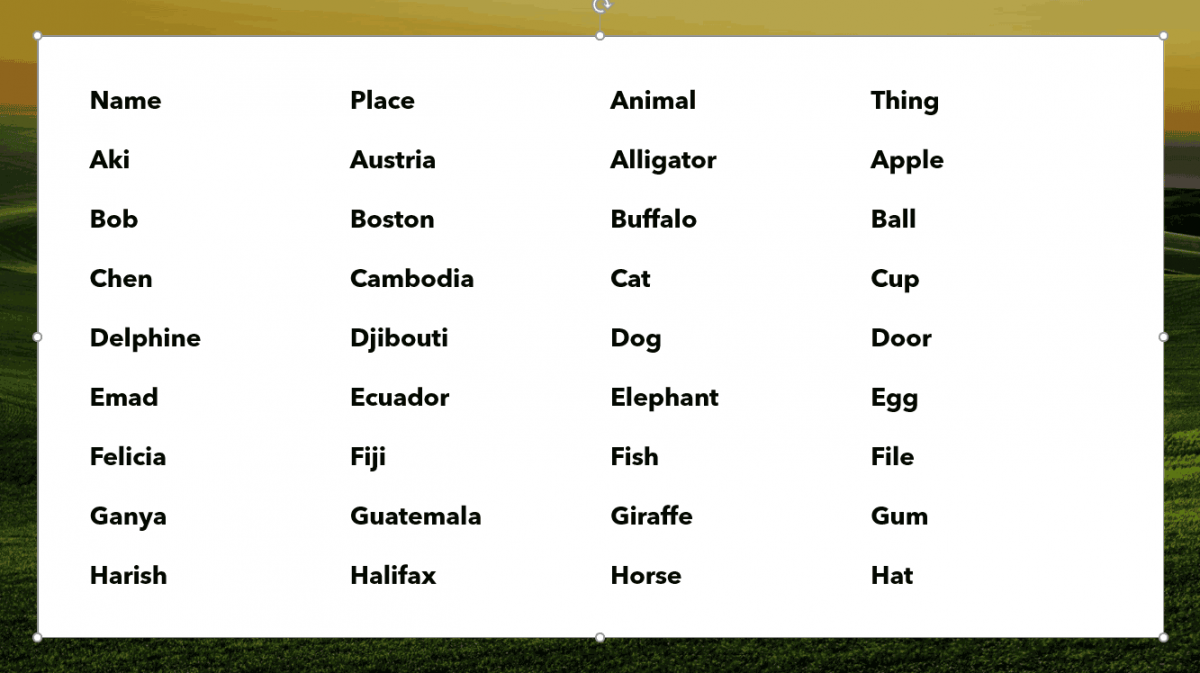
Figure 3: Table with No Style, No Grid style- Then I change the border color. It’s labeled Pen Color. With the Table selected, I use a light grey. This is usually the first or second chip down in the white column, as shown in Figure 4, below.
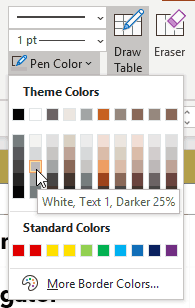
Figure 4: Choose the first or second chip down in the white column- Then I apply the light border using the Border icon (see Figure 5) beneath the paint bucket (Shading) option. I generally apply the inside horizontal borders, but even if I need other borders, I try to keep them as minimal as possible. Sometimes you have to click a border to turn it on before you can turn it off.
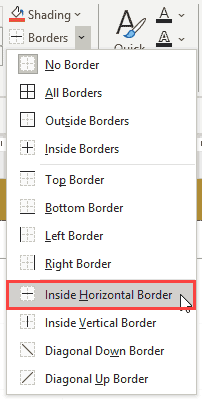
Figure 5: Choose inside horizontal borders- You can see the finished table in Figure 6, below.
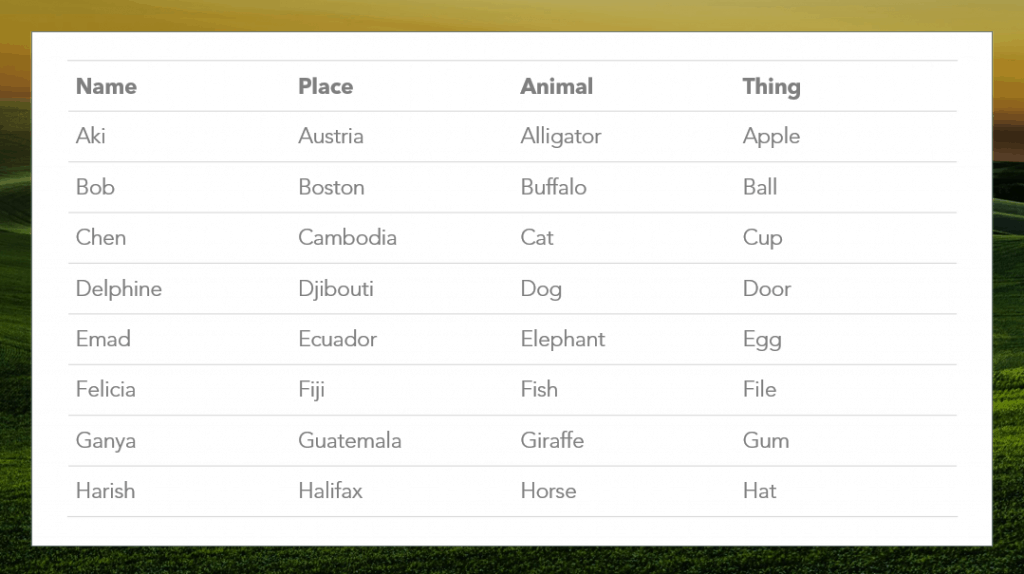
Figure 6: Finished table
This content was originally published on Indezine.com

A Microsoft PowerPoint MVP since 2000, Echo Swinford began her PowerPoint career in 1997. She holds a master's degree in new media from the Indiana University School of Informatics and is the owner of Echosvoice, a PowerPoint consulting firm specializing in custom template development, presentation creation, makeovers and cleanup, and training for large and small corporate clients. Echo has written and co-written five PowerPoint books, developed a number of video publications, and has a string of tech editing credits to her name. She is the President of the Presentation Guild, a not-for-profit trade association for the presentation industry.
